When looking for the king of all composters, gardening gurus say look no further than red wiggler worms (Eisenia foetida). Capable of eating the equivalent of their own body weight a day, there is no better way to turn kitchen scraps into black gold. Feeling a little jumpy? Get over it, and your gardens will reap the benefits.
There are multiple online resources to help you along this journey, but I learned a lot of the following information from Compost: How to Make and Use Organic Compost to Transform your Garden, by Clare Foster. Such a fantastic and informative read.
Big NPK Benefits
Not all poop is equal! That’s especially true when it comes to nutrient-rich worm castings, which contain five times more nitrogen, seven times more phosphorus, and 11 times more potassium than most normal compost. The pathogen levels are also very low, as the worm’s gut takes care of all of that. A dream come true for any plant.
A Little Goes A Long Way
Use the harvested worm droppings to get seedlings off to a good start, or gently work it into your garden soil as you would regular compost. You won’t need to use very much to satisfy your plants, and a new batch can typically be harvested every three months or so.
Anyone, Anywhere
Vermicomposting is an excellent option for those short on space. The bins are relatively compact, so they work well on small balconies, in the garage or basement, and even in the kitchen. It can also be used in conjunction with a bigger, more traditional compost bin in the backyard.
Don’t have a garden? Keeping kitchen scraps out of the landfill is detrimental, and this is a great way to do it. Some gardeners may even be willing to buy your harvested worm droppings for a fair price.
The Bins
There are many different housing options suitable for your worms. A quick online search will yield many pre-fabricated results, granted they’ll be expensive. You generally get what you pay for, and harvesting the worm castings will be much easier in a tiered system that is ready to use.
Other options include building your own vermicompost bin, which is the route I decided to go. This is the cheapest option by far, especially if you have some old Rubbermaid storage containers lying around. Read on for detailed (and easy) set-up instructions.
The Bedding
Many store-bought vermicompost bins will come with the bedding, but if building your container, you’ll need to handle this part yourself.
The worms need some nice high-fiber bedding to dig down into, and this is also what you’ll use to cover the food scraps you put into the bin to keep the smell, fruit flies, and vermin away.
Bedding options include straw, partially decomposed shredded leaves, coconut coir, shredded newspapers, egg cartons, or a combination of all of the above. If using paper, be sure there are no glossy, colorful magazine pages in there, which can be toxic. The newspaper I used did have color ink, but since most are vegetable-based, I’ve been assured this won’t be a problem.
Shred-it by hand into small one-inch pieces, or save some time and use a paper shredder.
Next, pour water over the bedding until it is as damp as a wrung-out sponge. Make sure it is consistently wet all the way through. Take a few handfuls of dirt or earth and mix it in. This gives the bedding some grit, which helps the worms with the chewing process.
Keep a spray bottle handy so the bedding is always moist.
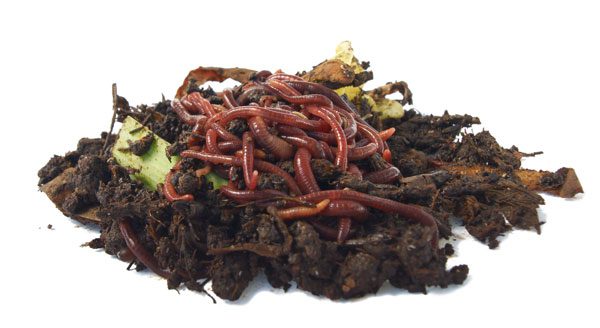
The Worms
Not just any worm will do; red wigglers (Eisenia foetida) are essential for vermicomposting bins, as they survive strictly on organic matter. Earthworms will not get the job done!
You can order batches of worms online, or source them locally. Because red wigglers reproduce very quickly, every 28 days or so, many local gardeners may start dividing their population and selling them cheaply.

Some experts say you need 2,000 worms to start a bin, others say 1,000 (about a pound) is a good number, but the reality is if you’re patient, any amount will do. The rapid reproduction rate means you can expect your worm population to at least double every month, so even if you buy less to save some money, you can build your way up to more significant numbers in almost no time at all.
The Food
In addition to the damp environment, the worms love plant-based kitchen scraps. It’s always a good idea to chop them up into reasonably small pieces to help the composting process move along faster.
I freeze my scraps (this helps with fermentation) and add them a little bit at a time, always making sure there is not too much food sitting in the bin at once. As the worm population grows, more food will have to be added at once. Check on the worms daily to see if they need some more food.
Never put any meat or dairy products into the vermicompost bin. Potatoes, onions, and citrus fruit don’t typically go over very well either.
Building A Bin
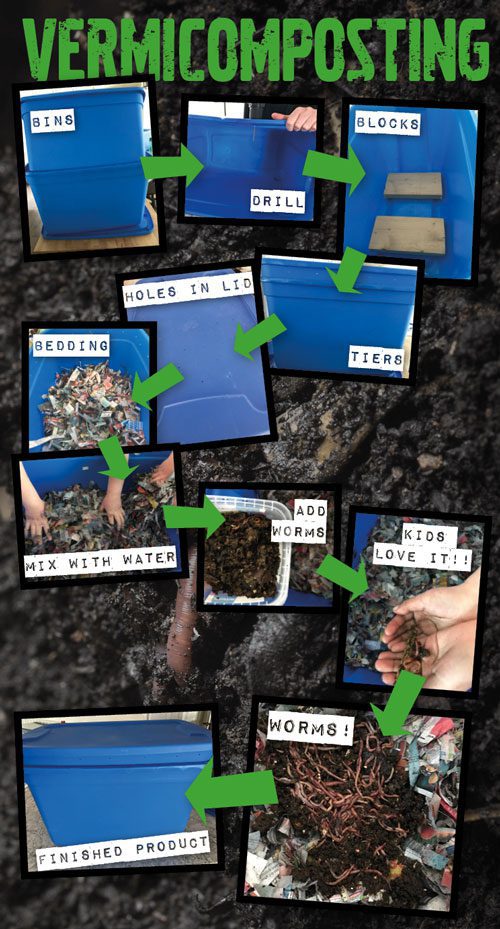
Building a worm bin is an easy project, and my two young kids loved working on it with me. I followed one of many online tutorials available, but it’s as easy as doing the following:
-
You’ll need two clean and opaque Rubbermaid storage containers, anywhere between 18-20 gallons each is good. One bin will hold the worms, and the other will trap any liquid that seeps out from the top bin, which is excellent for feeding directly to houseplants or gardens.
-
Next, take a drill with ⅛” bit (maybe don’t let your kids do this part) and drill holes along the sides of one of the containers, making sure they are close to the very top. This will ensure the worms get enough oxygen.
-
Drill another six holes in the bottom of the container, and about 30-40 in the container’s lid.
-
Take the second container and place two wooden blocks or bricks in the bottom. Place the container with the holes in it on top of the blocks, high enough so the top of the bin sticks up and the holes on the sides are exposed.
And, voila! You have yourself a super cheap vermicompost bin.
Once the bin is complete, add the bedding, moisten it, and mix it around with some dirt. Put your worms in and start them off with some kitchen scraps right away, being careful to bury it in multiple pockets in the bedding. You’ll notice the worms are very sensitive to light and will begin to burrow down almost immediately.


Store the bin in a part of the house heated anywhere between 40°F-70°F (5°C-20°C).
Do not turn or mix the bedding. The beauty about vermicomposting is it’s pretty much maintenance free. The worms will do all of the critical moving around for you.
Harvesting the Castings
Expect to be able to harvest the worm castings in about three months.
If you’re using a homemade bin, add some fresh bedding to one side of the container and bury kitchen scraps in it. After about one or two days, most of the worm population should have moved over to the new side, making it easier for you to harvest the black gold from the other side.
Using a sieve, take handfuls of material and shake it into another bucket. These are your castings. Any chunks of food or worms can be thrown back into the compost bin.
Troubleshooting
If at any time you notice the worms are climbing up the sides of the bin towards the lid, the environment is hostile. This could mean the bedding is either too wet, too dry, or too acidic.
Neutralize a sopping wet situation by adding dry bedding. Fix a dry environment by spraying the bedding with more water. If the kitchen scraps have created an acidic environment, add some crushed up eggshells, an excellent thing to do periodically anyway.
If it starts to smell or fruit flies appear, you’ve got too many kitchen scraps in there for the worms to handle.
Get Started!
Vermicomposting is a wonderful option for anyone looking to make a difference in the garden, or on the environment as a whole. It can be done cheaply and easily, and the returns will be extremely rich!