If there is any one place where the complaints of organic gardeners differ to that of my wife, it is in relation to the speed of which particular practices occur. Much like my gardening friends, I am inclined to justify the opinion that a quick release is a much more preferable option to a longer one. The problem is, typical organic nutrients are bound up in carbon complexes and take much longer to release their special life-giving properties. This is exactly the situation my other half would be much more appreciative of, but unlike a rich source of organic nutrients, my beans are usually blown way before the pods are even picked.
For organic farmers, there is actually a suitable solution to this, unlike the myriad of spurious websites that offer a questionable solution relating to the folly of my manhood. A soluble and instantly available set of nutrients can be provided to your plants if you so choose, you just need to prime them in the correct manner a little bit first. This is basically what we are looking at here; a way to make your own instantly available, water soluble, organically derived nutrients, courtesy, once again, of my bro-chacho from Korea: Master Cho.
Sounds good right?
“Instantly available organic nutrients?” I hear you cry. “Surely you must jest, there is no such practice of which I am familiar with”. This is no jest my friend, just a way to provide a quick fix of nutrient loveliness directly to your plants – as soon as they may need it. There are many ways to skin a cat, and this is one of the finest techniques in flaying felines (being one of the few ways you can achieve water soluble, organically available nutrients, immediately available for plant use).
Which elements are we talking about here? Well, mostly phosphorus and calcium. The building blocks of plant cell walls, these are two of the most crucial nutrients that a plant would need during pretty much any stage of its growth cycle. “Calcium and phosphorus?” you exclaim. “But that’s basically what our human bones are made of”. Well, bones are exactly where these two elements will be coming from, although ideally not human bones.
Let’s start at the very beginning
Apparently, it is a very good place to start. Unfortunately, this is actually a slightly misleading sub-heading, because this is not really the beginning. In order to start right at the very beginning, you will need to make some vinegar. If you can’t be arsed to wait three months for your vinegar to properly turn, then you can simply purchase some. Organic distilled is usually best; something locally-sourced, ideally, to be more in keeping with the whole ‘save the planet’ theme. If you can be arsed to make your own vinegar – simply double (or so) the volume of the waste from when you make some FPJ with water, and let it sit in a cool, dark place for a minimum of three months (less with an added mother).
Anyway, once you have a suitably large volume of vinegar, you can then proceed to source your bones. (That is if you want calcium and phosphorus. If you just want calcium, then you can use things like eggshells or oyster shells, or something else in that vein.) Once you have your vinegar and your bones gathered, you will need a suitably large container for it all and something to cover it with.
You will need:
- Bones – enough to fill about a tenth or so of your container.
- Breathable cloth – to cover the container afterward.
- A BBQ, or grill – to burn the bones.
- Vinegar – enough to fill the rest of the container after the bones.
- Elastic bands – to secure the cloth.
- A strainer/gauze – to filter zee final solution.
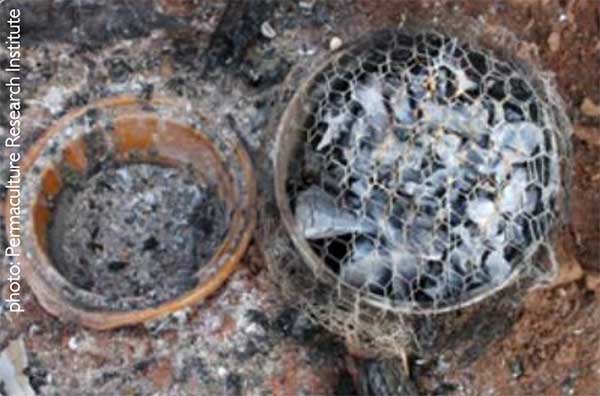
Step 1: Burn the bones (or eggshells etc)
Yes, you read that right, burn the bones. Some might say that the effects of the bones can be enhanced by creating the just right conditions during the flambé. Apparently, combusting under a full blood-moon, atop a stone plinth in the middle of a pentagram and in the presence of virgins monotonously reciting the Lord’s prayer backward will dramatically increase the efficacy. I’m still learning how to recite the Lord’s prayer in reverse to test this, but I’m sure it will at least double your yield.
In all seriousness, they do need charring to the correct degree. Break them down into smaller chunks and chuck them onto a BBQ until they have turned a nice black, coal-esque color. Ensure they are not undercooked – a brown hue of the bone will remain if so. At the same time, don’t over-do it, it will turn to an ash grey/white on the surface of the chunks and you’ll have to start over. With eggshells, crush them and cook them in a pan until browned (not blackened).
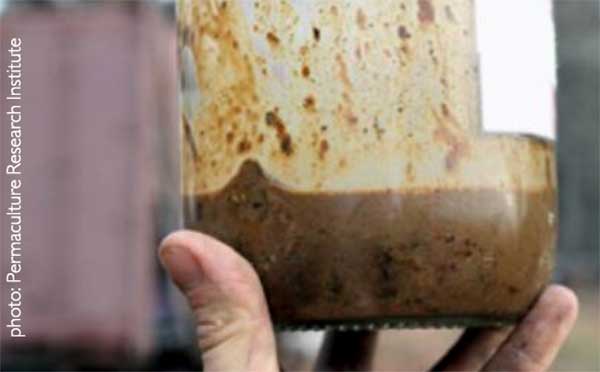
Step 2: Fill your container
This is a pretty self-explanatory step of the process. You need to fill your container with the bones you just burnt (or the shells you just toasted) to approximately one-tenth of the total volume. Then, you simply grab your vinegar and fill the other nine-tenths accordingly. Watch it as it starts bubbling in a totally cool and awesome way.
Step 3: Leave it alone
Cover with a breathable lid and leave for at least five days, more like ten sometimes. Leaving this longer than necessary will not degrade the final product. Once the bubbling stops, it is pretty much done.
Step 4: Strain it out.
Grab yourself a fine mesh and pour the solution through, removing any of the bits and pieces.
Step 5: Put into storage.
You can keep this solution in an air-tight container, unlike most other KNF inputs, so it makes for a much easier liquid to store.
Step 6: Use it
Normally, administer it at a rate of 1:1000. That’s 1ml per liter for those who can’t be bothered to figure it out. Maybe more if you see your plants lapping it up. It can be used as a root drench or as a foliar spray. Adding a teaspoon per liter of Epsom salts to the solution will add a touch of magnesium as well. Essentially, you’d be making your own organic calmag, which, as we all know, is the answer to every plant problem ever.
Et, voila mon petite fleur
That’s it! You are now the proud owner of some awesome, organically derived nutrients, ready to rock and roll. Also, you just burnt some bones and basically performed alchemy; pretty cool if you think about it. Anyway, make sure you have your camera ready when you pour the vinegar in (especially with the eggshells) because it makes for a super cool video to impress all your friends on the social media thing with.
Read more articles in the Korean Natural Farming series:
- A Guide to Korean Natural Farming
- Korean Natural Farming: Master Cho Biography
- Korean Natural Farming and Indigenous Microorganisms
- Korean Natural Farming: Feed Ferment To Your Plants
- Korean Natural Farming: DIY Organic Growing Inputs
- The Fundamentalists of Korean Natural Farming
- Korean Natural Farming: DIY Water-Soluble Organic Nutrients
- Korean Natural Farming: DIY Herbal Remedy For Plants
- Merging Hydroponics With Organics In Korean Natural Farming
Thank you, I really appreciate everything you are sharing. I just found your website after searching for KNF.
Happy Growing!
I’ve found a bunch of instructions on how to make this and when to apply, but nothing on frequency of application. Thoughts?
Some like LAB can be used regularly. But others maybe just once. I’ve made ferments from roots. I use once for clones. Or another I make from first bloom dandelion flowers. I use that in early flower. Again, I will use it once.
This advice is based on my experience. Right ferments at the right time. Be a mad scientist and test things.