If you’ve been thinking about building a greenhouse in your backyard but still haven’t pulled the trigger, I have one piece of advice for you: do it. If you’ve already decided to go ahead with the project, this should give you a general idea of what to expect as you build your sanctuary.
We purchased an 8’x12’ cedar greenhouse kit from a Canadian supplier early this spring. I worried that I had purchased too soon (we still had snow on the ground), but then COVID-19 hit, and greenhouses began flying off the shelves as people looked to become more self-sufficient.
If you’ve been having trouble finding a greenhouse kit to buy, please check your local listings. So many people either try to sell used kits or are offering their services to build them for you.
Of course, there are also many online tutorials on how to build them yourself! There’s no right or wrong choice.
We opted for a greenhouse kit because there was no messing around; everything we needed came wrapped up on a large pallet, including the cedar, the shelving, the polycarbonate windows, automatic roof window openers for ventilation, as well as the screws.
No matter what your choice, consider automatic roof openers! They open and close on their own at about 70°F, which creates the ultimate environment for your plants and allows you a little more freedom on hot days.
The Lay Of The Land

First and foremost, check with your city or town to see if you’re allowed to install a greenhouse and make sure you follow their construction regulations.
You’ll also need a flat area on your property that is away from any slopes. You don’t want water running towards the structure—more on how to prepare the land later.
Finally, decide if you want to stain your greenhouse and do it before you build it if you ordered a kit. Cedar is a very durable wood and weathers to a silvery grey, which I like, so we didn’t stain.
The Orientation

I did a lot of research on this part of the project, and there are two schools of thought when it comes to greenhouse orientation.
Without question, you need as much light as possible. A spot on the property that gets at least 6-8 hours a day of sunlight is ideal.
If you want to extend your growing season or even grow throughout the winter, maximize sunlight by positioning the greenhouse East to West (we went with this option).
Otherwise, go with a North to South position to get good light and ventilation.
The Foundation
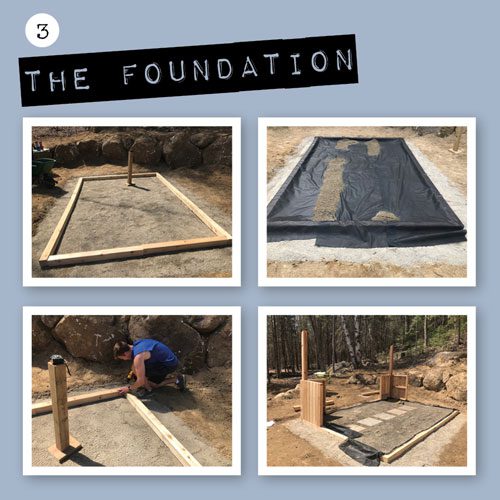
Building the foundation is easy, but it’s the most time-consuming aspect of the project.
Before you start, think about whether you’re heating the greenhouse through the winter and how you plan to do it. Will you be laying heating cables or adding extra insulation?
We live in an area where wintertime temperatures can drop to -30°C, and heating will be expensive — too pricy to offset the cost of buying fruits and veggies. Instead, we will be using the greenhouse to extend our growing season, so we didn’t go with extra heating or insulative materials.
The foundation doesn’t have to be fancy; our greenhouse supplier specifically suggested going with something that drains well, such as several inches of compacted sand followed by several inches of packed gravel.
My husband made a little DIY compactor and working with a level (very important), we ended up with a smooth, perfectly even foundation for the greenhouse to sit on.
Before filling with a final couple of inches of gravel, we lay patio stones down for a walkway. This is a very basic path; you can choose to go with something a lot prettier and extensive, but be prepared to spend a lot of time and money on it.
It took us about a day and a half to get the foundation just the way we wanted it.
Building Up
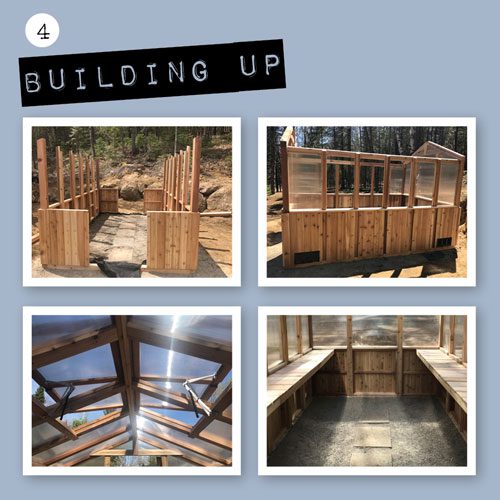
Once you move on to putting the walls up, the project moves fairly quickly. The red cedar came in pre-cut pieces, so we didn’t have to use any saws.
It took about two full days from the time we started putting the walls up to the time we finished. It wasn’t too challenging to build, but with two kids and three dogs running around, it was time-consuming.
Still, it was so worth it.

My she-shed is now ready for growing, and I know I’ll get many years of enjoyment out of this sanctuary!
Look for more posts in the future on growing out in the greenhouse.
Follow @cat.gardenculture and #outinthegreenhouse to read more about greenhouse gardening.