It should be no surprise that it is possible to multiply and grow organisms from across the kingdoms of life directly from their tissues, including plants, fungi, and animals. Animals present the biggest challenge, followed by plants. Plants are perhaps easier to grow and maintain in the lab than either fungi or animals, but concerning tissue culture, the mushroom-producing fungi are the easiest to work with by far. The growth media are easy to make, no hormones are required, and most fungi will grow well vegetatively over a fairly wide temperature range. Producing mushrooms requires additional work, but obtaining and maintaining starting material in axenic (uncontaminated) culture is a necessary first step.
The fungal kingdom is diverse, but we will focus on basidiomycete fungi that reproduce by generating spores in mushrooms with gilled caps. Pretty much any of the common edible species such as Agaricus bisporis (button mushroom, crimini, portabella), Pleurotus ostreatus (oyster), Lentinula edodes (shiitake) and many others can be cultured from the fruit bodies—the mushrooms themselves.
Much of the equipment needed for growing mushrooms is the same for plant tissue culture (see sidebar). A variety of media will support fungal growth, but one of the easiest to make and most effective is potato-dextrose-agar (PDA). You can buy ready-to-make PDA in powder form (or even media already in Petri dishes), but most fungi will grow better on home-made. Here’s one way to make PDA:
If the agar is poured hot, it will create a lot of condensation in the plates, increasing the chance of contamination later on, so let the agar cool to close to its gelling point before pouring. There should be enough for about 6-10 dishes poured fairly deep. Deep plates will not dry out as fast as shallow ones. Once the agar sets, these plates are ready for use or stored in a refrigerator wrapped in plastic.
Now you need a mushroom. Experienced mycophiles will find and recognize possible candidates in their forays in the woods and fields. Since discussing the identification of wild edible species is beyond the scope of this article, we will assume you have a mushroom in hand that you wish to propagate. For training and educational purposes, you can try store-bought mushrooms but be advised that intellectual property agreements and related restrictions may prohibit the reproduction of commercial strains.
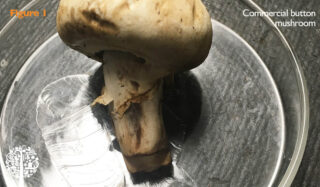
We begin with the humble button mushroom (Figure 1). First, select a mushroom as young and fresh as possible with no signs of decay. Work in a HEPA-filtered laminar flow hood if available. Otherwise, work quickly and keep the mushroom tissue and the agar surface exposed for as short as possible. Here is a step-by-step procedure:
1. Wipe down all work surfaces, disinfect all tools with 70% isopropanol, and have several PDA plates nearby.
2. Wear rubber gloves (nitrile preferred) and wash gloved hands with 70% isopropanol. No short sleeves! YOU are usually the biggest source of contamination.
3. Use an X-ACTO knife or a scalpel to make a small slit in the side of a selected whole mushroom cap. Sometimes it works better if you make the slit in the stem’s bottom.
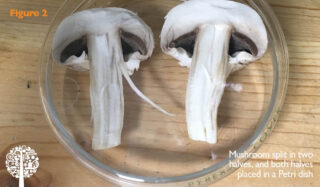
4. With the slit as a starting point, gently tear the mushroom in two halves, place both halves in a Petri dish, and cover with the lid (Figure 2).
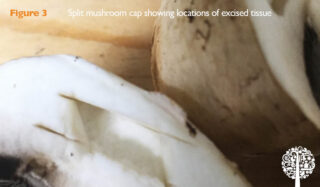
5. Remove the lid from the covered mushrooms and, using a sterilized X-ACTO knife or scalpel, cut a small piece of tissue from the center of one side of the cap. Choose a location that is as far away as possible from the outer surface of the mushroom. Figure 3 shows a mushroom that has been sampled.
6. Keep the tissue sample on the end of the cutting tool and replace the lid over the mushroom.
7. With one hand, lift the lid off of a PDA plate (but keep the lid hovering over the agar surface for protection) and transfer the tissue sample from the tool to the center of the agar surface and quickly replace the lid. A larger tissue sample will have a better chance of getting going than a small one.
Repeat the process several times to increase the chance that at least one of the plates will produce a contaminant-free mycelium (mycelium = colony of filamentous fungus). Incubate the cultures in the dark at room temperature. Inspect the cultures every day and discard any that have bacteria or mold on them. Mushroom hyphae (the slender thread-like cells of the filamentous fungi) produce a fuzzy white colony emanating directly from the tissue sample. Molds tend to grow faster and will produce colored spores. Look for a solid bit of pure white fungal growth on the sample, and after a few days, it will expand onto the PDA surface. Sometimes the mushroom mycelium will grow but also be contaminated. In this case, it is often possible to subculture the fungus until a pure culture is obtained. If there is little or no contamination, but nothing grows, the mushrooms are too old, and you need better starting material.
Mushroom mycelium can be refrigerated on plastic or Parafilm® wrapped Petri dish for several months without losing vitality.
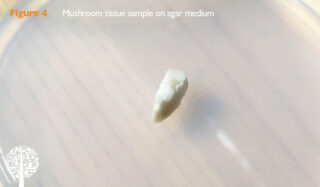
Figure 4 shows a PDA plate with a small bit of tissue taken from a button mushroom.
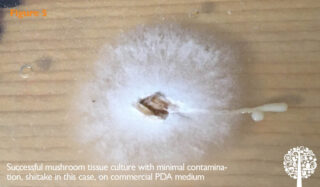
Figure 5 shows a culture becoming established. Once you have a pure culture, you can keep it going indefinitely by serial transfers to a fresh medium.
There is a lot to growing a successful crop of mushrooms, but a big part of success is starting with uncontaminated material, and that is what you’ll have once you master these techniques.
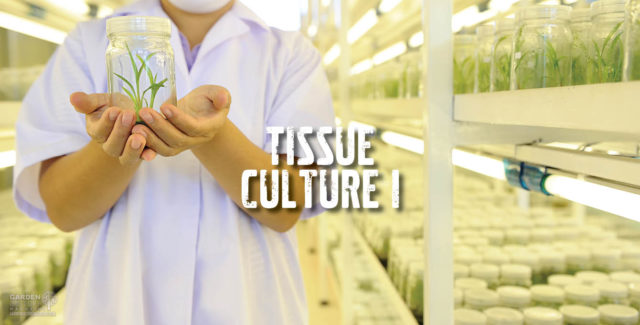
There’s more than one way to propagate plants! In the first article of this series, Philip McIntosh talks about tissue culture and how it works.
In our third Tissue Culture piece, Philip McIntosh helps us with sterile techniques to reduce the chances of propagation contamination.

Thinking about growing delicious mushrooms at home? Of course, you are! Let’s get you started by choosing the right substrate for your mushroom-growing venture.
One Response
During a Google search for mushroom cultivation in Pakistan and its effects on human health, I chanced upon this documentary which I found extremely informative and engaging. Anyone looking for information on mushrooms should watch this incisive documentary by clicking this link: https://www.youtube.com/watch?v=_1GKMSzHKA8