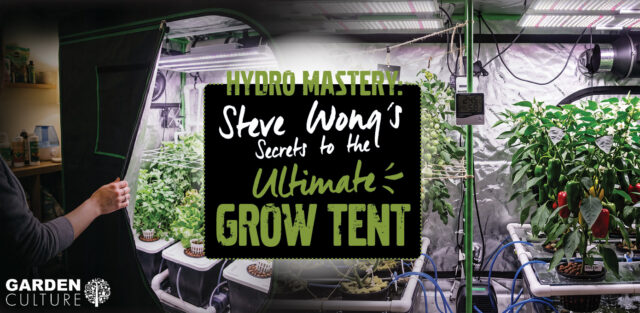
Steve Wong of Hydro Bros, a trusted industry insider, shares his expert guide on setting up a productive indoor grow tent for optimal results.
Why Grow Indoors?
Indoors, you can manage all the variables. You create the environment, decide how long the sun shines, and set the room temperature and humidity levels. Indoors, you’re in the driver’s seat. Outdoors, you’re the passenger. However, successful indoor growing doesn’t necessarily come easy. Here’s my guide to setting up the ultimate indoor grow space.
The Room or Tent
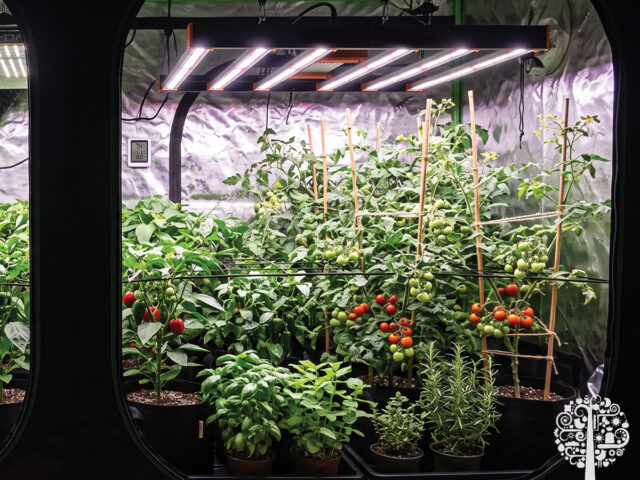
Most people choose a tent because building a proper room is a big job. A tent involves opening a box and setting it up within the day. Consider where the tent will go in your space. People pick a size based on how many plants they fancy and never think about where they will set it up.
You will need working space inside the tent, at the front at least, and ideally down one side. Never underestimate how much space you’ll need outside the tent, either for mixing nutrients or storing bottles. That footprint is real, and it always ends up bigger than you planned for. Finally, ensure the tent fits your space before ordering. Measure the room and the tent’s height.
Air Extraction – The Key to ANY Indoor Grow Tent
The math for the unit you need for air extraction is simple enough:
Volume of your space in cubic meters (length x width x height), multiplied by 60.
That’s the m³/hr you need to change the air in the tent once a minute.
Now, multiply that by 1.3 to add 30% on top.
That covers all the stuff that quietly steals your airflow once the kit is in a real room rather than on a spec sheet:
- Heat from your light: A fan working against a hot room doesn’t work as well.
- Duct length and bends: Every bend is a tax. A tight 90° elbow costs you, and a floppy run of concertina sagging its way across a loft is worse.
- The carbon filter: You’re pulling air through a packed bed of carbon, which is basically a wall, and the fan has to fight it.
- Silencers, attenuators, anything else you’ve bolted inline.
- Running throttled: Most people run a controller and never take the fan anywhere near 100%. There’s nothing wrong with that, but size for it.
Get this bit wrong, and you’ll spend the whole grow chasing temperature and humidity problems.
Size the filter to the fan, not the other way around, and never smaller. Match the rating or go a size up. The filter does an important job: killing off pungent odors. Too small and it chokes the fan and stinks the place out anyway, which is the worst of both worlds.
Filters don’t last forever. Nobody mentions this at the point of sale, and it’s the thing I end up explaining most often. The carbon has a working life, and once it’s spent, you’ve just got an expensive restriction doing nothing. Twelve to 18 months is a rough figure for a room running most of the year, and less if you’re pulling damp air through it, because moisture kills carbon faster than anything else. Running a pre-filter sock over it and washing it every few weeks is the cheapest way to get more life out of an expensive filter.
Use decent ducting. The cheap concertina stuff leaks, and it kinks the first time you look at it funny. Insulated acoustic ducting costs more and pays for itself on noise alone.
Light Sources
HPS and LED are the two options, and LED is the norm now. However, LED has only become the default in the last two years, and the market’s already saturated. This is good news for price, bad news if you’re trying to choose, because a cheap LED and a good LED look identical in a photograph and behave nothing alike three years down the line. What separates them is the driver, the diode binning, the heatsink, and whether anyone’s still answering the phone when something packs up. Ask what the warranty is, then ask who actually honors it, because those are two different questions.
A proper hanging height is essential. Too close and you’ll bleach the tops; too far away and those rays never reach the plant. Every decent manufacturer publishes a hanging chart for veg and flower, so read it and dim the thing rather than eyeballing it from the doorway.
Watch for light leaks; stand in your grow room or tent with everything off, let your eyes adjust, and look properly. Zips, cable ports, the passive vent flaps, that corner where you’ve shoved an extension lead through. If you can see daylight coming in, the plants can too, and interrupted dark periods can throw up problems that look exactly like a dozen other problems. You’ll lose a month diagnosing the wrong thing.
Remember, lights off is a completely different environment. Temperature drops, humidity climbs, and that’s the window mould has been waiting for. A hygrometer with a memory function is worth the money, but I’ll come back to that.
The Intake: Do You Need It for Your Indoor Grow Tent?
I only ever recommend an intake fan once the room or tent is already set up. Get the space running, see what it does for a few weeks, then decide. Without one, you’ve got a passive intake. The air coming in is just the natural pull created by the negative pressure your extraction fan makes. The tent sucks in slightly at the sides; air finds its way in through the passive vents, job done. For most small setups, that’s completely fine, and you can stop reading this section.
An active intake is a fan pushing outside air into the tent. Too much of it and you tip over into positive pressure; the tent blows up like a balloon, and the odors stop leaving via your carbon filter. Instead, they get forced out of every zip, seam, and cable port. Extraction always pulls harder than the intake pushes. Slight negative pressure, sides drawn gently in; that’s what you want to see. Done properly, it earns its keep. It’ll help with temps by forcing cooler outside air in rather than relying on whatever the tent can be bothered to suck in on its own.
Remember, pumping outdoor air in ramps up your chances of mould pathogens, insects, spores, and everything else you spent good money escaping in the first place. You’re opening a door. So, filter it. A bug barrier over the intake fan works. A Phresh Intake Filter will do the trick. It’s designed and built to stop any nasties from coming into your grow room.
Where you draw the air from matters as much as whether you filter it; pull from a warm, stuffy landing, and you get warm, stuffy air. Pull it in off the garden in January, and you’ve got a different problem entirely. Neither is wrong, but you need to know where you’re pulling it from, and when.
Power: Don’t Burn Down the House
What have you got plugged in? A light, a fan, an intake, a dehumidifier, a heater, and a water pump all hanging off one four-gang extension in one socket is how fires start. Know the wattage of every item, know what the extension is rated for, and don’t daisy-chain them. If you’re running anything with size, get a sparky in and have a dedicated circuit with an RCD. A couple of hundred quid, and it removes an entire category of catastrophe from your life.
The Two Bits People Skip (and both cost almost nothing)
Air movement inside the tent is essential. Your extraction moves air through the room; it doesn’t move it around. A couple of oscillating clip fans keep every leaf gently rustling, breaking up the still layer of air on the leaf surface so the plant can transpire and breathe properly. It also stops damp pockets from forming in the canopy, and stems that get pushed around a bit grow thicker. Gentle sway is what you want. If the leaves are flapping, you’ve overdone it.
Knowing your numbers is also crucial. Get a decent hygrometer and thermometer with a memory function, and put it at canopy height, not on the floor. Know what the room does at 4 am, not what it does when you’re in there with the doors open. Temperature and humidity on their own don’t tell you much, anyway. Together, they make VPD—the pull the air exerts on the plant. Warm and reasonably humid in veg, then a bit drier through flower, roughly speaking. You don’t need to turn into a spreadsheet person.
When the Room Won’t Behave
On a muggy September night when the outside air is at 85% RH, no amount of fan is drying your tent out. That’s when it’s time to stop adding airflow and add tools like a dehumidifier. Size it to the space, and remember it dumps heat while it works, which is sometimes a bonus and sometimes a brand new problem. Consider adding a heater on a thermostat (not a timer) for when lights are off in the winter, and finally, a controller to tie it all together. This is where modern kit properly earns its money.
What I’d Buy first For the Best Indoor Grow Tent
I’d spend my money in the following order:
- A decent tent
- The biggest quality fan and filter the space will take
- Lights
- A proper timer and a hygrometer
- Two clip fans
- An intake fan (only if the room’s told you it needs one)
- A dehumidifier, heater, and controller when the room proves it can’t hold its numbers on its own
Final Words
So, we’ve gone and built it! You can’t buy control. You get it by building a box that behaves predictably and by paying attention to what it’s telling you – the ultimate indoor grow tent!