Have you heard of a garden olla (oy-yah)? They’ve been around for thousands of years. According to the Farmer’s Almanac, they are one of the most eco-friendly ways to conserve between 50 to 70% of water usage in the garden.
That statistic was enough to pique my interest and to discover that ollas are one of the simplest things to incorporate into my growing regime. Unglazed terracotta pots, with the drain holes sealed, are buried in the ground with the open neck of the pot just above the surface.
They are filled with water, and a lid is placed on the open top to prevent evaporation. Over time, water slowly seeps out of the porous pot, watering the surrounding plants.
An olla works because of something known as soil moisture tension. Moist soil is compact, tight, and able to exert pressure on the olla, holding it in equilibrium with the surrounding soil structure.
As the soil dries out, the pressure on the olla is released and water escapes. How far the water goes from the olla depends on its size and the soil quality surrounding it.
Dense soil doesn’t water out as far as loamy or sandy soil. Over time, the roots of the plants will begin to seek out the water source and grow toward and around the olla; this allows for even and consistent watering.
An olla gets an automatic gold star from me because of the time it saves me watering the garden. A small olla of about one liter will take a day or two to empty, even in hot weather.
Because you bury it in the soil, an olla provides a deeper watering than a hose or watering can facilitate; this encourages a more robust root system, which grows a healthier plant.
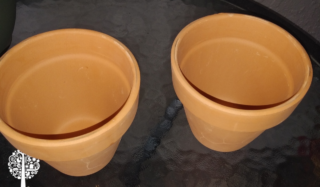
Garden centers are catching on to the garden olla craze, and many are selling them. But you can also make your own if you have some unglazed ceramic pots hanging around.
The first step is to ensure the pot’s bottom drain hole has a water-tight seal. When I made my olla, I used a waterproof silicon sealant and a piece of thin glass to cover the drain hole.
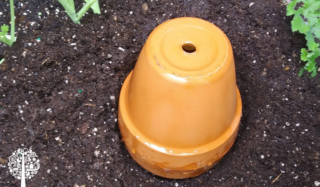
My pots were small; I glued two together, inverting one on top of the other to create an olla that would hold about half a liter of water. I could have just buried one pot and covered it with a lid, but I would have had to fill it more regularly, and it wouldn’t have been as deep into the soil as I would have liked.
After the silicon dried, I buried my olla in the veggie patch, but anywhere would have been fine. I left about 10-15cm of the pot above the surface so I could always find it.
I filled the olla using the drain hole of the inverted pot on top, covered it, and voila, I had a garden olla!
Easy, time-saving and healthier plants – what more can you ask for?