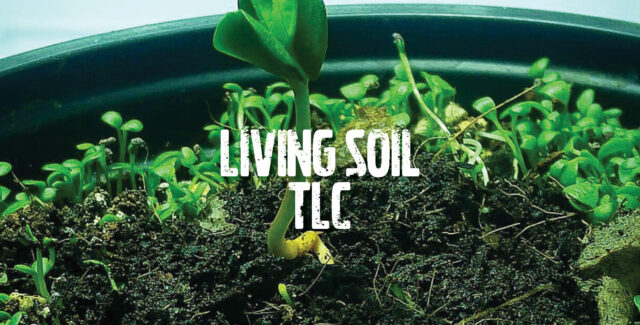
The first and second parts of this series look at living organic soil, its benefits and how to build it following nature’s lead. This final part will help you maintain and improve it over time.
The nutrition in living soil comes from the microbes in the compost that start to feed on the inputs and break them down into their mineral forms so the plants can use them. Until the bacteria have done their work, the minerals are locked up in the amendments, and therefore, the plants do not get overfed. The plants release something called “root exudates” into the soil to attract the different microbes they need to release their desired minerals. It is a trade between plants and microbes – exudates for minerals – working together to help each other. This type of exchange is what soil scientists and ecologists call “mutualism”.
When growers bottle-feed organic nutrients, they create a similar blast of microbial activity that causes a flash of nutrition, but it is gone as fast as it comes. A well-made living soil will have continuous availability of nutrition.
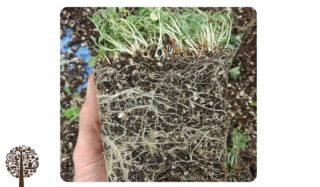
Another benefit of real organic living soil is that you can introduce worms to your containers and use them as a team of composters and aerators working 24/7 to keep the cycle of nature moving. They don’t eat and digest but rather filter the decomposing organic matter into its mineral forms and coat it with enzymes that help with the availability of nutrition. With worms, you can reuse the same body of soil repeatedly, just like in nature.
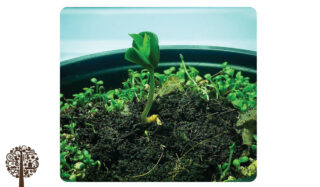
Most living soil growers use a mulch layer to cover the soil’s surface, keeping moisture in and allowing root and microbial activity at the soil surface. Popular materials for mulches are chopped straw, hay, and even stalks and leaves from the previous crop’s waste trimmings. If you can create a good layer of composting nutritious mulch, it will feed the soil as you water. If you have worms in your soil, they consume the decomposing mulch and create vermicompost on the soil surface.
If growing no-till style with mulch and worms, you will also develop other insects beneficial to the living soil system. Don’t be put off by these insects; they will protect your plants and keep things in balance. The most common is hypoaspis miles (now called stratiolaelaps scimitus), which feed on fungus gnat larvae and thrips pupae. They often build up good populations and commonly come from the compost source, helping you by patrolling for bad guys. You can use many other specialist predator species to combat common grow room pests and avoid the need for sprays and pesticides.
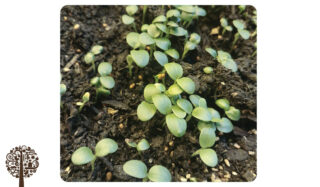
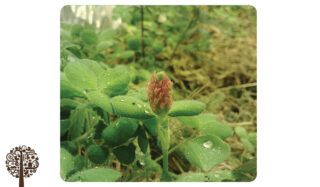
To get the soil life working well, having more than one plant species growing in the pot can help. Living soil growers often cultivate a ‘cover crop’ such as clover, peas, millet, vetch, and buckwheat. These plants establish quickly and can help fix nitrogen while promoting the establishment and continued growth of mycorrhizal fungi. Cover crops can grow through the mulch layer and help form a living mulch. Once the plant canopy is well established, a common technique is to ‘chop and drop’ the cover crop, allowing it to decompose and become food for the soil microbes and worms.
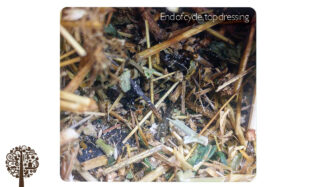
Depending on what you’re using in your soil mix and the pot size, some growers like to supplement additional inputs throughout the cycle. The easiest and most effective way is often to top dress; this means dusting the soil surface with whatever you choose to use and then letting it get drenched into the soil as you water. Top dressing the same balanced blend of organic inputs and minerals used for the original soil mix is ideal, or you can use other straight dry amendments such as malted barley powder, insect frass, or comfrey powder.
If growing long term in containers, a regular top dressing of amendments and a fresh layer of compost at the start of bloom and again at the end of each cycle keeps everything status quo. If adding some inputs you didn’t have in the soil initially; top dressing is also ideal. Compost teas have been widely used and recommended within the no-till scene. If using compost teas, we suggest making a compost extract instead of a brew. Add compost to water, agitate thoroughly, and then apply straight away. This allows microbial development in the soil, not in a tub of bubbly water. The same can be said about instant microbial teas, which are equally effective.
You can also use liquid additives such as seaweed extract, liquid fish hydrolysate or emulsion, amino acids, humic and fulvic acids, coconut water, and Aloe Vera extract. If you are keen on using bloom boosters, be sure to do your research and find out what’s in them. You don’t need to apply PK booster with living soil, but some organic bloom boosters from fermented plant extracts are compatible. Many no-till growers use Korean Natural Farming (KNF) techniques to make their fermented plant extracts.
Of course, anything added should be carefully considered as the quality is of the utmost importance. Do not add something unless necessary. Keep it simple, and nature will provide.
It is recommended to use four 40L to 50L pots per square metre to provide an adequate reservoir of nutrition for your plants. That’s 160-200L of living soil per square metre of the canopy! Choosing fabric pots with handles is a good option, as the plants remain fairly portable if required. Some growers like to plant cuttings or seedings directly into these final pots, but if it is a new soil mix, then it is often best to have plants already established in smaller containers with a good root ball ready to adapt to its new home.
The key to living soil is the moisture level; it is essential not to over or underwater the containers. Because they are much larger than growers may be used to, they can hold water longer, and if the plant is still small, it may cause overwatering. When starting with living soil, you need to ease the plant in gradually by watering it a little and often. A good rule of thumb for watering after planting is 5-10% of the total pot volume (40L pot = 2-4L of water). Watch how they use that water by checking the soil surface over a few days, then steadily increasing the water volume the more they transpire.
Keep the top wet without water-logging the bottom. Water will sink to the bottom of the pot, which means there is a risk of overwatering while trying to keep the top moist. You may need a pump sprayer or fine rose watering can to moisten the top layer regularly rather than drench the whole container. While the plants are small, it is best to be extra careful, but once in full bloom, they will be able to drink much more. Typically, a grower using 40L pots will water each pot up to 2-4L daily, but some plants may even need a bit more every few waterings.
With timer and pump-powered drip irrigation systems, it is highly recommended you know precisely how much water the soil needs in your growing environment before switching to full automation. Autopot irrigation systems fed by a valve in the bottom tray or other sub-irrigated planter systems are also suitable for living soils. With systems like this, it’s still important to get the living soil volume per M2 correct (160-200L). It is also best practice to water by hand from the top until the plants need watering daily; then, you can automate the bottom feeding.
The most attractive aspect of growing using living soil and no-till methods is what happens at the end of the growing cycle. Rather than throwing away the soil or adding it to outdoor beds, growers can retain the same containers of soil for reuse. That means no tipping out containers, no dust, and no re-filling. If you look after the soil, it will improve over time, and your harvestable goods will also get better. If intending to re-use the soil from the start, you should already have worms doing their work and a mulch layer creating a compost effect from the top. This way, all that is needed is the addition of new plants as space becomes available. Just dig a little hole and go again!
If you didn’t plan to re-use the soil but still want to, you only need to remix it with some fresh compost or vermicompost, along with a few other amendments. Most growers start with the 40L pots and then end up with 50L once they have added around 10% more compost plus the amendments. When remixing, you will need to empty the container but don’t worry about removing any root mass, as it will get consumed by the microbes. Depending on the pot size the new mix goes into, it may heat up and feel warm to the touch. This is where the microbes break down the quick-release inputs for immediate nutrition, but it will cool down after 7-10 days and be ready to use. Planting a cover crop and waiting to see if it comes up green and healthy is an excellent way to tell if the soil is ready for the main crop. Some companies now sell amendment kits that include everything you need to re-amend used living soil but remember, it is crucial to start with high-quality living soil, not just regular potting soil.
When the soil life is well-fed and in harmony, the plants will grow themselves. Use what is available locally, and don’t overcomplicate anything unnecessarily. Just remember to start with high-quality organic soil, and you will already be halfway to having abundant, glorious produce for your effort!