A strange sense of desire and urgency came over me one day when I was on Galiano a few years ago, and suddenly, I knew I needed to start growing food indoors. I needed to start fixing what was seemingly becoming an issue for many Canadians: access to fresh food. I immediately contacted friends in the growing industry to decide how to move forward with my indoor farm. This seemingly random desire to grow food has become more than just a hobby; it’s a near obsession.
Part of my obsession with having year-round access to all types of food is creating the right, cost-effective environment. I have been experimenting with this for three years and have spent a lot of time trying to perfect indoor food production. There is no reason for everyone not to produce food on a small scale at home. Over the years, society has removed people from nature; it’s time we reintegrate into the art of growing food for ourselves.
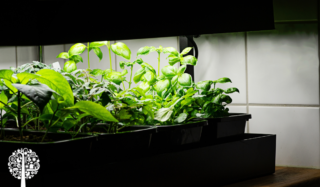
Small-scale indoor farming is relatively easy and cheap and doesn’t involve much work. However, as with most designs, the only thing the same is they are all different. We can grow indoors in many ways; one method is not better. Whether using hydroponics or soil, choose the right approach for you. On my farm, we use soil-based media. But if I lived in an apartment, I would seriously consider a media-less environment. Below, I will describe a simple and successful way to grow microgreens indoors using soil.
At Galiano Grow House, our primary focus for indoor food production started with microgreens. These small and fast-growing greens pack a substantial nutritional load and grow quickly. They are typically ready to eat in 8-14 days and require few nutrients and little artificial light. For microgreens, our typical crops include speckled peas, sunflowers, radishes, lentils, popcorn, fava bean, and buckwheat. My favorite, and one of the easiest to grow, is sunflower sprouts.
WATER TEMPERATURE
HYPOCHLOROUS
Prepare by mixing:
Plug in the Hypochlorous Acid Generator and activate the first cycle. The Hypochlorous needs two cycles before it is ready.
SOIL MEDIA PREPARATION
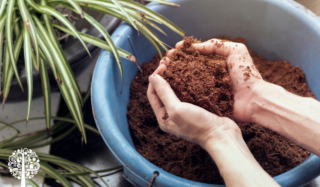
Store the peat and soil media mix in barrels outside the grow room and cover them with a lid. During the winter, the materials can freeze and harden. Break the frozen clumps with a shovel before using the mix. During more humid seasons, the peat can grow mouldy when stored in the bag. When putting the peat in the barrel, mix well so it can oxygenate and dry.
You will need:
Using the 2L pot, scoop the soil media mix two times per tray for 4L of soil media per tray. Spread the soil evenly, breaking any clumps as you go.
Add 100g of sunflower seeds to a 750 ml container and fill halfway with a mix of water and silica. Soak for 16-22 hours; if using large sunflower seeds, six hours will suffice.
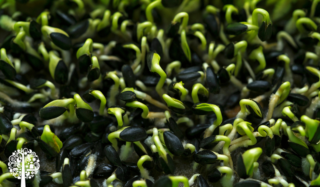
After soaking, rinse the seeds and water the prepared tray of soil media before planting. Gently sprinkle the seeds evenly throughout the soil mix, then cover them with a clean tray weighted with rocks, wood, or slates so the seeds press into the media.
The day after planting, and every day after that, mist the seeds with water and spray them with hypochlorous acid. Nine to 12 days after planting the seeds, remove the lid and place the sprouts under the grow lights. Gently remove the shells from the greens.
By day 13, the sprouts will be ready to harvest! Do not water microgreens before picking them; water generously the day before. Safely use a knife for harvesting. After, wash and dry them in a salad spinner. After washing, the sprouts will last longer if completely dry, so placing them on a tray under a fan is a good idea. Then, collect the greens and store them in a container in the fridge.
Before planting another crop, washing all of your trays well in a sink is essential. Spray them with hypochlorous acid and allow them to dry.
Growing microgreens at home is easy and fun! Enjoy your nutritious harvest in salads, omelets, sandwiches, and more!