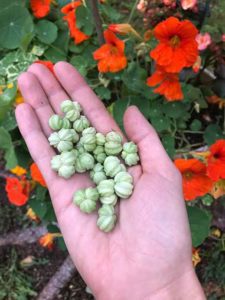
When the sun sets earlier and the nights start getting cooler, you know it’s time to start thinking about saving your seeds for next growing season. It’s almost too daunting to think about starting over again in the spring, especially after devoting so much time and energy to your beloved garden over the past several months. Having said that, saving seeds is totally worth it.
There are so many benefits to saving the seeds from your garden for next year’s planting. The most obvious reason to do it, of course, is to cut down on costs. Take from what you already have, and you’ll save big money in future gardening ventures. Not only that, but home-saved seeds have already adjusted to your particular climate, and are more vigorous, meaning they’re more likely to germinate.
 What To Save?
Saving the seeds of annuals, wildflowers, vegetables, and herbs is actually quite easy. All you need is a patience! If you’re new at seed saving, maybe start with annuals, as they’re the easiest to preserve. Self-pollinated vegetables such as tomatoes, beans, lettuce, and peas are also good ones for beginners.
Choose from many different plants of the same variety if you can, so that you can improve the chances of finding the strongest seeds for germination.
When To Save Them?
Gardening Complete: How To Best Grow Vegetables, Flowers, and Other Outdoor Plants suggests waiting to collect seeds until the plant matures, just before it starts to drop, or once the fleshy fruit is fully ripe.
How To Gather Seeds
Collecting your seeds for next season’s garden could be as simple as going out and pulling pods off of your plants, like nasturtiums, for example. Or, there could be a little bit more to it.
When it comes to plants such as arugula, chives, radish, or columbine, Gardening Complete recommends snipping off the stalks and turning them upside down into large paper bags. Once the pods start breaking apart, the seeds will be trapped inside the bag.
If you’re looking to harvest the seeds of fleshy fruit, such as tomatoes, eggplant, or strawberries for next year’s sowing, spread the seeds over some paper towel. Leave it open and let the seeds dry completely before folding it up for storage.
Make sure your seeds are completely dry before storing them. I usually spread them out on a plate or paper towel in a window sill. If you notice fungus growing on them during the drying process, they won’t be viable for next season.
Where To Store Seeds
Seeds should always be stored in cool, dry places. I personally like to use small envelopes or paper bags for storage, as they’re easy to label and put away for the winter. Gardening Complete offers a great tip for repelling pests from your stored seeds: place small pieces of untreated cedar in seed jars or near any of your envelopes.
Now What?
After collecting all of your seeds, drying, and storing them properly, you have nothing left to do but look forward to next year’s inexpensive and beautiful blooms in your garden.
You’ll likely have more seeds than you’ll need, so it’s an excellent opportunity to share with other gardeners in your community at local seed swaps. Any seed swap (or even a seed bank), whether it be at a large-scale gardening fair or in your living room with a handful of friends, means there will be more opportunity and places for seeds to grow, creating more beautiful and healthy environments for us and pollinators alike.
Featured image courtesy of US Preppers.
 What To Save?