Light is life for all gardens, but it’s probably one of the trickiest aspects of indoor growing, especially since it’s not as easy as simply flipping a switch! From proper fixture placement to lighting plants from surprising angles, a few tweaks to your growing space can help you take advantage of every ray. Here are 5 Cool Ways to Light Up Your Indoor Garden.
1. Dial in Distance
Lighting is a science, and getting the distance right is essential to your indoor garden’s success. Placing fixtures too high means plants won’t get enough usable light and will become leggy. But closer isn’t always better when you light up your indoor garden! Too much heat and light intensity can cause bleaching, leaf curl, and stunted growth. What kind of grow lights are you using? LEDs run cool but can still burn leaves; HIDs (HPS) heat up fast and can scorch plants. Follow your fixture’s PPFD/distance recommendations, which are usually included in the box or found online.
Don’t forget to consider the garden’s growth stage and the types of plants you have; this will affect how close you can hang lights. Finally, a few common tools and gadgets go a long way in reading the environment: a PAR meter gauges light intensity, and a thermometer at canopy level tells you when things are way too hot. Take your readings and adjust from there.

2. Side Lighting
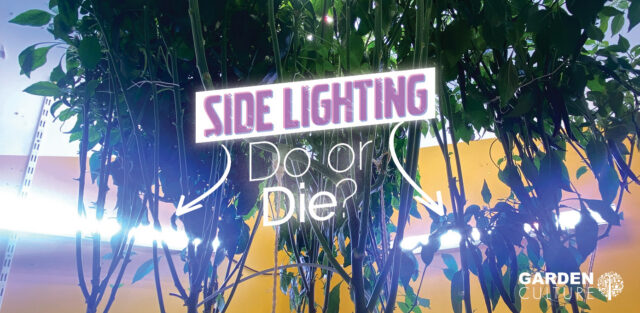
The classic vision of a grow room always includes top lighting, but what about the sides? Additional lighting fixtures emit light laterally to benefit the sides of your plants, rather than just the upper canopy. Studies show that combining top and side lighting enhances plant growth and photosynthesis, improves internal structure, and leads to better branch formation and earlier fruit production.
In his article, Side Lighting: Do or Die? (GC archives UK59/US57) Garden Culture’s Everest Fernandez writes that side lighting can substantially increase marketable produce! You can mount high-quality single LED light bars on walls or hang them from their sides. As with overhead lighting, make sure the fixtures are secure and properly installed. Remember, plants with side lighting may dry out faster, so watch moisture levels and increase irrigation as needed.

3. Upside Down Lighting
If the idea of side lighting blows your mind, hold on to your hat (and protective sunglasses!), because many good growers are turning to upside-down lights, or sub-canopy lighting, to transform their indoor gardens. It’s not necessarily about adding extra light, but about redistributing it. The canopy typically gets all the attention; why neglect what’s going on underneath it?
LED bars can deliver photons to both sides of the leaves and flowering sites, allowing the plant to receive light evenly. Possible benefits of upside-down lighting include higher yields, better-quality plants, and less need for pruning and defoliating. When supplementing from below, growers can potentially reduce overhead intensity, but top-notch canopy management is still essential. Many sub-canopy lighting options exist; ask your local grow shop for recommendations!

4. Extra Rays
If you’re growing a simpler indoor garden (herbs, greens, houseplants), there are easy ways to maximize your light. Believe it or not, under-cabinet LEDs shining directly over an aloe plant or some herbs can give them the boost they need. Look at the windows in your home and match their lighting conditions to the plants you want to grow. Tap into your creativity in low-light areas by using mirrors to reflect sunlight toward plants or by painting the walls a lighter color.
Don’t forget to remove screens and keep windows clean so sunlight can reach your living space. Screens alone can block around 25% of natural light. No need for a grow room or tent; you’ll be surprised at how much food you can produce on a kitchen windowsill or countertop when the lighting is right.

5. Dirty Lights, Dimmer Lights
Like other surfaces in your home, grow lights need regular cleaning to maximize output. When the fixture, reflector, or lens is dusty, your plants receive less energy for photosynthesis. Before starting a new crop, clean your grow room, tent, or ‘green corner’ thoroughly, including all of the artificial light sources. Turn off the power and make sure they’re cool to the touch before wiping with a damp microfiber cloth.
Never use harsh chemicals to clean grow lights, and wait until their surfaces are completely dry before plugging them back in and turning the power on. Always check the manufacturer’s guidelines before getting started. Cleaning might feel a little less cool and more like a chore, but it’s an easy, cheap way to keep your space efficiently lit.